Saturday, March 29, 2014

Easy Decorative Solar Lights


These are one of the easiest crafts I have done. Here is what you need:
Solar lights from Dollar Tree
Fish bowls or sugar containers from Dollar Tree (or any glass container that the lights will fit into)
Glass pebbles from Dollar Tree


Take the stick off of the solar lights. Put the glass pebbles in the glass container. These are to hold the light in place as well as lift it up if you have a deep container. Finally place the light into the container with the flat solar side up. I didn't place pebbles in the sugar container at first. I wanted the light to be lifted up to be level with the top of the container and thats when I tried the glass pebbles later.


Sunday, March 16, 2014

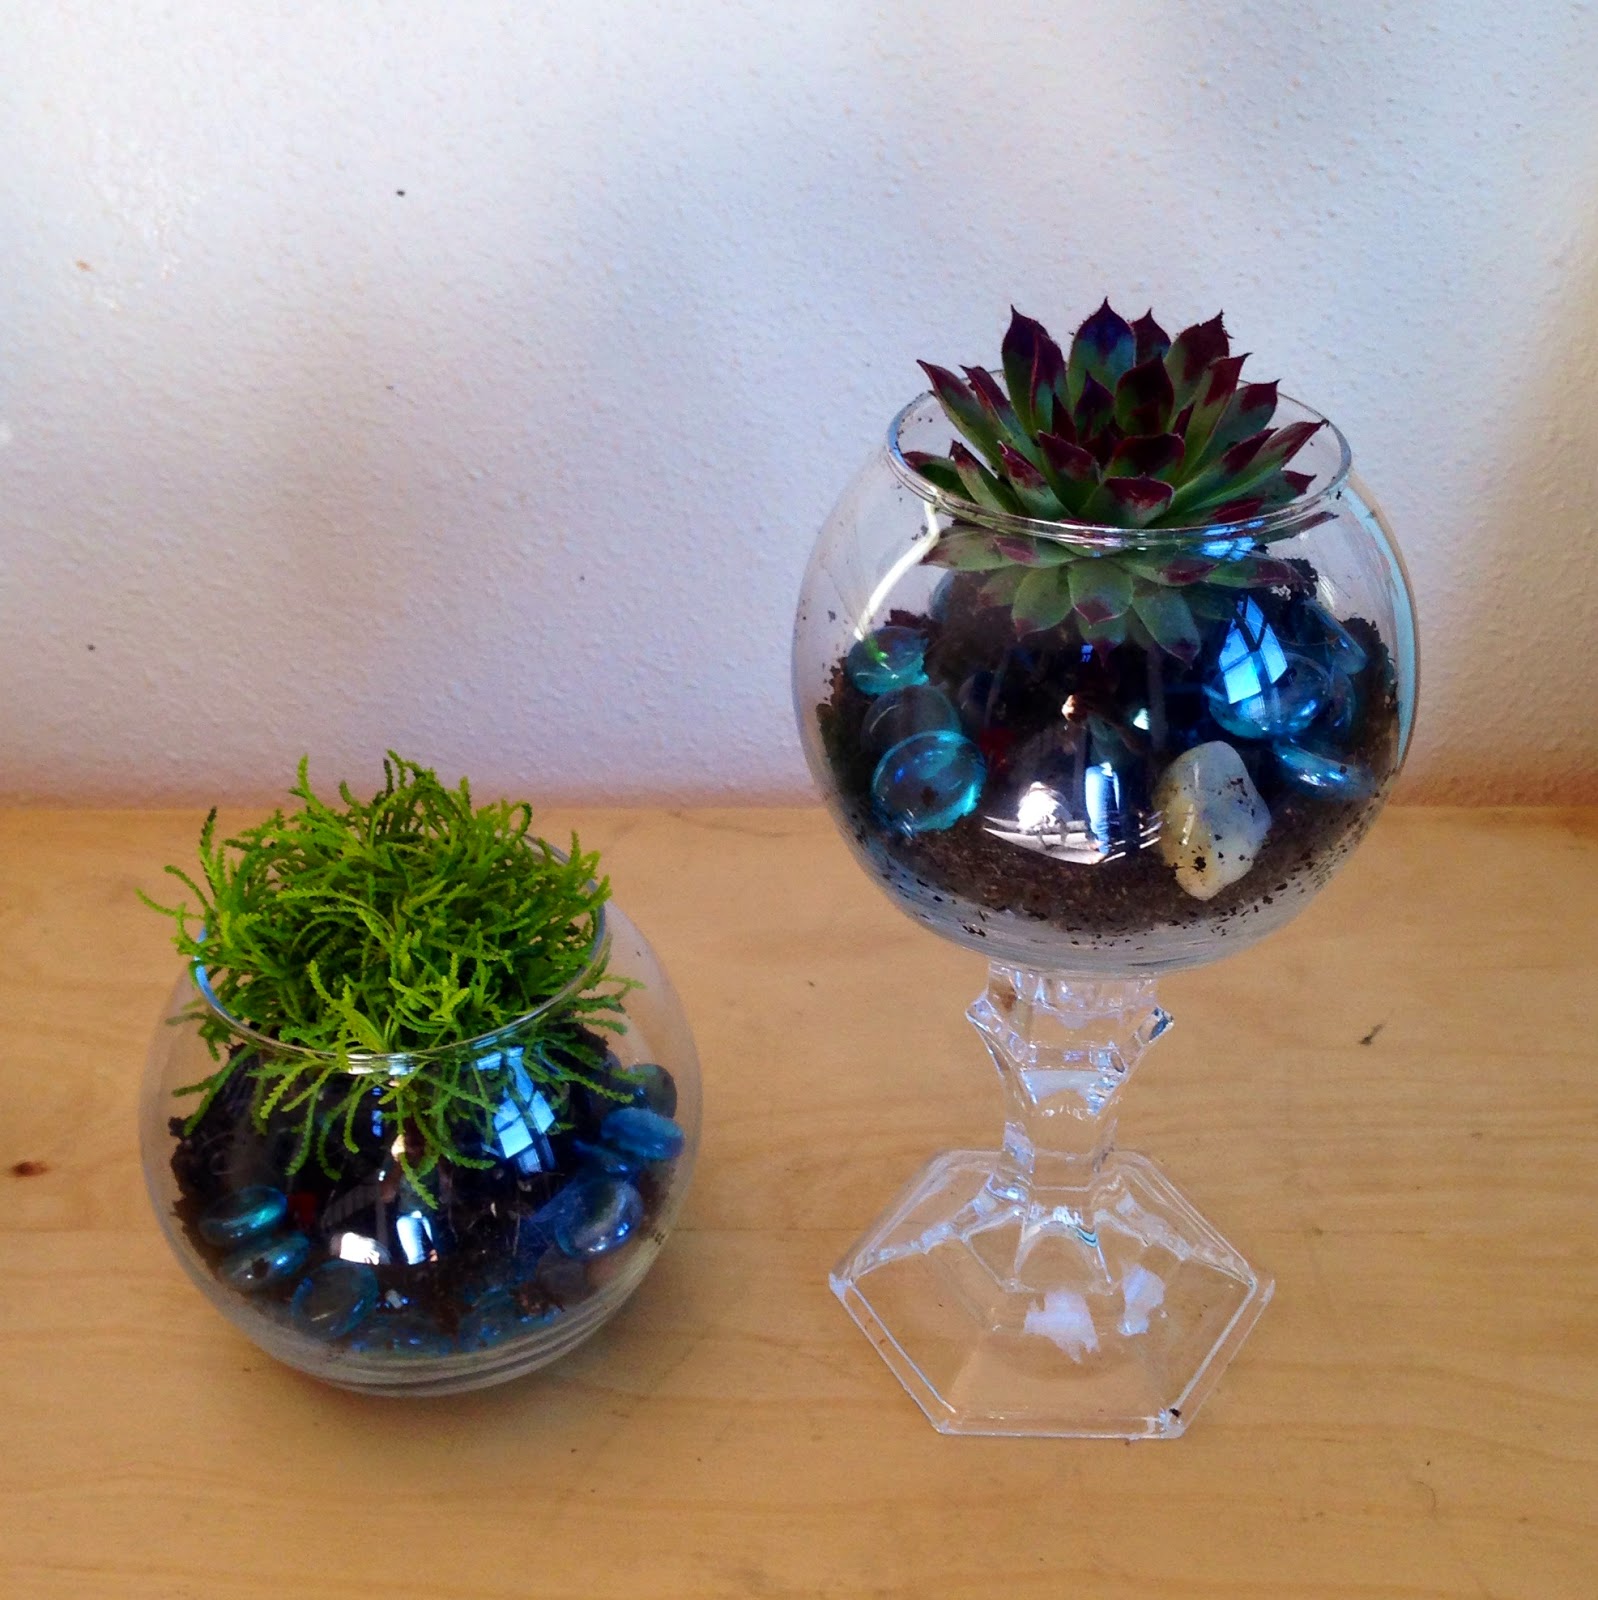
Dollar Store Terrarium

I got this idea from The Budget Decorator. You can use moss balls that you find at the Dollar Store or real plants. I used real plants I got from our local grocery store.


This craft is easy and cheap. 
You need:

glass fish bowls from the Dollar Tree
glass candle stick from the Dollar Tree
hot glue
real or fake plants
some stones or fish bowl pebbles from Dollar Tree

The instructions are at the link above. Its a very easy and quick craft and great for shelves or table tops. 

Button Tree


I don't have pictures of the process but this craft is pretty simple.

You need:

buttons in any color you like
canvas
paint
hot glue
tree stencil or draw free hand
pencil

First a painted my canvas light blue. I couldn't find a good tree stencil to use so I got a flat wood Easter decoration shaped like a tree from Joann's and used that to trace a tree on my canvas with a pencil. You can free hand draw this if you are good at that sort of thing. After I traced my tree I used brown and gold paint to paint the entire tree. Then I used a glue gun to hot glue my buttons onto the branches. I also glued some at the base of the tree trunk. Thats it! This is a fun craft for kids too.

Thursday, March 6, 2014

DIY Headboard

I finished this project about a month ago but it took me forever to get around to hanging it because that was actually the hard part! I don't have a great bed picture (still need pillows!) but here is a finished image of it.


You need:
insulation board from Home Depot
upholstery pins 
material (about 3 yards)
staple gun and staples
hot glue 
chalk
level
measuring tape
razor or exacto knife
damp rag
damage-free 16 lb picture hanging strips

Cost: mine was less than $40 using coupons, sale fabric and supplies on hand.

I recommend ironing your material. I did not because I don't have an iron but you can see in my images that my material is a little wrinkly. I measured my bed to see how long I needed my board to be and then used an exacto knife to cut the board down to size. The blade only cuts about half way through, and then you can bend the board over at the cut and it will break apart. After that I placed the board down on top of the material and started folding the material over the sides to make sure it was centered and fit. Once you have it all centered start stapling the material down. You want to make sure its tight enough to keep everything flat but don't pull too hard or the staples will pull out. I would do the two long sides first and the short sides last.


Once you have done that, turn your board over and check to see that your material is flat and tight enough to not sag or have any visible wrinkles. Also make sure your material doesn't cover too far over the sides onto the back of the board- you need exposed board on each corner to stick on hanging strips, unless you use another method to hang your board. Then turn the board back over and use a hot glue gun to place dabs of glue under the material where the staples are, as well as on top of the staple. This will keep your staples in place.


After you have done this to every staple let it dry for a little bit. Then turn your board back over so it's facing up. Now you need to measure where you will place your upholstery pins. I used a tape measure and chalk to mark the spots where I would place the pins. I placed my pins 2 inches apart.


Before I stuck the pins in, I placed a dab of hot glue on the underside of my pin to help it stick so it didn't fall out. Once all the pins were in place I used a damp rag to brush away the chalk.


Now the hard part! I used 4 hanging strips. I put two on the top corners of my board and two at the bottom corners. Place them on the board itself, not on the material. Also try to place them in the exact same place on each corner so that it's easier to measure out where to put the opposing strips on your wall. Measuring and marking the space on the wall is what I found the be the hardest part of this project. After you place the strips on your board, measure out where the opposing strips will need to be on your wall and use a level to make sure your strips are straight so your board will be straight across the top. Place the strips and then let them sit and cure for an hour. Use a level and and someone's help to stick the board up onto the wall. Good luck!

Canvas Photo

I have over 100 image prints from my Instagram account. I need a way to display them but haven't found something I'm in love with yet. I did find something I like a lot though and its a good way to display some of my very favorite shots. It is also a simple craft project and doesn't take much time.


You need:
prints
matte mod podge
sponge brush
canvases, any size you like

Use the sponge brush to paint mod podge onto the back of your images and press them onto the canvas. I placed mine in the center. Let them dry and then use the brush to paint a thin layer of mod podge over the entire canvas including over the top of the image. Let dry.


Sunday, March 2, 2014

Tea Party Cake Stand

I found this idea on Dollar Store Crafts. One tutorial for this idea is for making a lamp which would be really cute but I wanted something a little easier. The tutorial I liked is for a cake stand. I also have seen one made into a bird bath which is also a great idea! I decided to make mine a little taller than the one in the linked tutorial. I used a bowl, plate, teapot, sugar dish, tea cup, two tea plates and a creamer pot. I got them at Goodwill. You can also find dishes at Dollar Tree that would be good for this project. 

You need:

Dishes
E6000 glue
Primer
Spray paint
Ruler
Level

I started by stacking them until I found a combination I liked that was also level and even on all sides.


Then I glued them together one piece at a time. It takes a little patience for the glue to dry with each piece but it's important. You can use the ruler and level with each piece to make sure you have them straight and to make sure they aren't tipping to one side. I gave it a day to dry before priming it with white primer. You don't want it to fall apart when moving it to paint it. 


It took a few coats of primer. Do not prime or paint the top of your cake plate because that is where your food will be sitting. Unless you use food safe paint. I first painted it while it was upside down and then used a paper plate to cover the top when I painted it right side up. After I primed it I waited another day before painting it blue.


Mine has a few dripping glue spots under the cake plate. My creamer dish wasn't level on the top so I used hot glue to even out one side, but it dripped a little. Overall I like the way it turned out. I plan to use the smaller plates as cookie or fruit tiers (with paper underneath because my paint isn't food safe) and the top for cupcakes or cake! 


Saturday, March 1, 2014

Its The Little Things

I have a large crafting project that I finished but haven't installed in its eventual home and so I haven't posted recently. I have been waiting to get it set up so I have the end result image to show you. In the mean time I have a couple new things to post about. One is not so much a craft but a decorating idea. I have a large white bowl on the bar of my kitchen and a bunch of empty cleaned out Bath and Body Works candle jars. I usually fill the bowl with some sort of seasonal decoration balls. I wasn't sure what to use for spring and summer but I wanted to add some color to the kitchen. Thats when I saw these plastic fake lemons at Dollar Tree. I love that place for this sort of stuff! I got about twelve of the big lemons and a few packages of the small lemons and put them in both the large white bowl and one of my empty candle jars. I love the bright color in my kitchen!