
Friday, December 12, 2014
No Need For Dryer Sheets!
If you don't want to buy dryer sheets or if you have an allergy to them like some of my family does, I have a simple no-cost solution for you. You may have even seen this in one of those life-hack articles that gets shared on Facebook. Simply ball up a piece of tin foil from your kitchen and toss it in the dryer with your clothes. Thats it! No static cling! I have been using this one for awhile now. Try to ignore the dirty top of my dryer!
Sunday, November 30, 2014
Winter Terrarium Globe

I got this idea from a Homes and Garden magazine and Im glad I did because I had a cracked terrarium globe sitting around waiting to be repurposed!

Here is the magazine version of this:


Super cute!
I used glue to seal the crack in the bottom of my globe. Then to hide that I coated the outside lower part of the globe with mod podge and covered that with glitter and let it dry:

The inside of my globe wasn't large enough to place all my items so I spray painted a Bath and Body Works candle lid white and glued it to the bottom like this:


Next I spray painted my deer and the cake stand I would be placing the globe on:

Before I glued the deer and tree to the bottom I glued some glitter covered leaf stems around the candle lid inside like this:


Next I glued the tree and the deer to the bottom:

Finally I covered the bottom with fake snow and tied a green glittery ribbon to the hook on the top of my globe.


Later I placed some extra pieces like a white pine cone inside and some berry stems around the globe outside. It was a super easy craft that didn't take much time except for the drying of the paint!

Sunday, November 23, 2014
Chocolate Chip Cookies With a Dash of Science!
I made these yesterday and they are delicious! I used a recipe from my Betty Crocker New Cookbook but I did a couple things different. I used the science behind baking the perfect cookie to be sure they came out the way I wanted. I wanted them thick and fluffy and not as sugary as normal. I got over 2 dozen out of this recipe and they were fluffy and slightly more... powdery or firm (?) than chewy. Below I posted the recipe along with the changes I made.

3/4 cup granulated sugar (I used baking sugar)
3/4 cup packed brown sugar (I skipped this completely- if you use brown sugar they will be more chewy and sweet)
1 cup butter (thats 2 sticks, melted or softened)
1 teaspoon baking soda
1 teaspoon baking powder (I added this to fluff them up)
1 large egg
2 1/4 cups of flour
1/2 teaspoon salt
1 package of chocolate chips
Heat oven to 375. Mix sugar, butter and egg in large bowl. Then stir in flour, baking soda, baking powder and salt. Finally stir in chocolate chips.
Put them in the freezer for 60 minutes. This keeps the butter from spreading so much when baking, that way they don't flatten out so much.
Drop dough in a rounded tablespoon onto a cookie sheet.
Bake 8 to 10 minutes.
EAT THEM!
Saturday, November 22, 2014
Snow Covered Tree in a Globe
This might be the easiest craft ever! Makes a super cute gift too!

a small fish bowl from Dollar Tree
metalic pipe cleaners from Dollar Tree
fake snow
small size christmas tree from Michaels Crafts or Dollar Tree
hot glue
glitter
First thing I did was put a drop of hot glue on the bottom of the tree and place it in the center of the fish bowl. Then I sprinkled fake snow around the tree and sprinkled glitter over the tree. Lastly I wrapped a silver metallic pipe cleaner around the mouth of the jar. Thats it!
Candle Jar Christmas Decor
I buy a lot of Bath and Body Work candles and I can't stand to throw out the jars once the candles burn up so I clean them and keep them for holiday crafts. These also make great gifts!

miniature christmas village items or other small decor (I got mine at Dollar Tree)
any jar you like that will fit your decor- to learn how to clean an old candle jar click here
glue gun
fake snow

I used the lid of my candle jar to attach the decor to. That way I can turn the jar upside down so that light comes in and you can see it from all sides. Its more like a globe this way. All you have to do it place some drops of hot glue to the bottom of your decor and then place it in the center of your lid like this:

Let it dry and then place a drop of glue on the inside corner of two sides of your lid. Put a little fake snow in your jar and then place the lid on top. Turn it upside down and shake your snow into place. Thats it!
Garlic Butter Brussel Sprouts
I was looking for a simple and delicious way to prepare brussel sprouts. I keep a lot of garlic in my kitchen so I decided to throw 1 minced garlic clove, a tablespoon of butter and a teaspoon of ground pepper in a pan with 6 halved brussel sprouts. I cooked them a little more than five minutes. I like mine a little crispy on the outside so once the outer layer started to turn brown I was done! They are so yummy! Quick and easy to make too! If you don't like butter you can easily substitute butter with oil.

Snowflake Canvas Craft
This was another easy holiday craft. I got the gold glitter decor at Dollar Tree. I already had the canvas and the blue glitter.

You need:
Mod Podge
sponge brush from Dollar Tree
glue gun
glitter
canvas
flat ornament from Dollar Tree
First you spread a thin layer of Mod Podge over the entire canvas. Then sprinkle glitter over the entire canvas until its covered how you like. Let it sit for a few minutes and then hold the canvas upright over a bowl to let the excess glitter fall off. Let the canvas dry completely. After it is dry use a glue gun to place drops of glue to the back of your ornament. Place the ornament on your canvas and press down for a minute until the glue sets. Let it dry flat for a bit before hanging it or setting it upright.


Friday, November 21, 2014
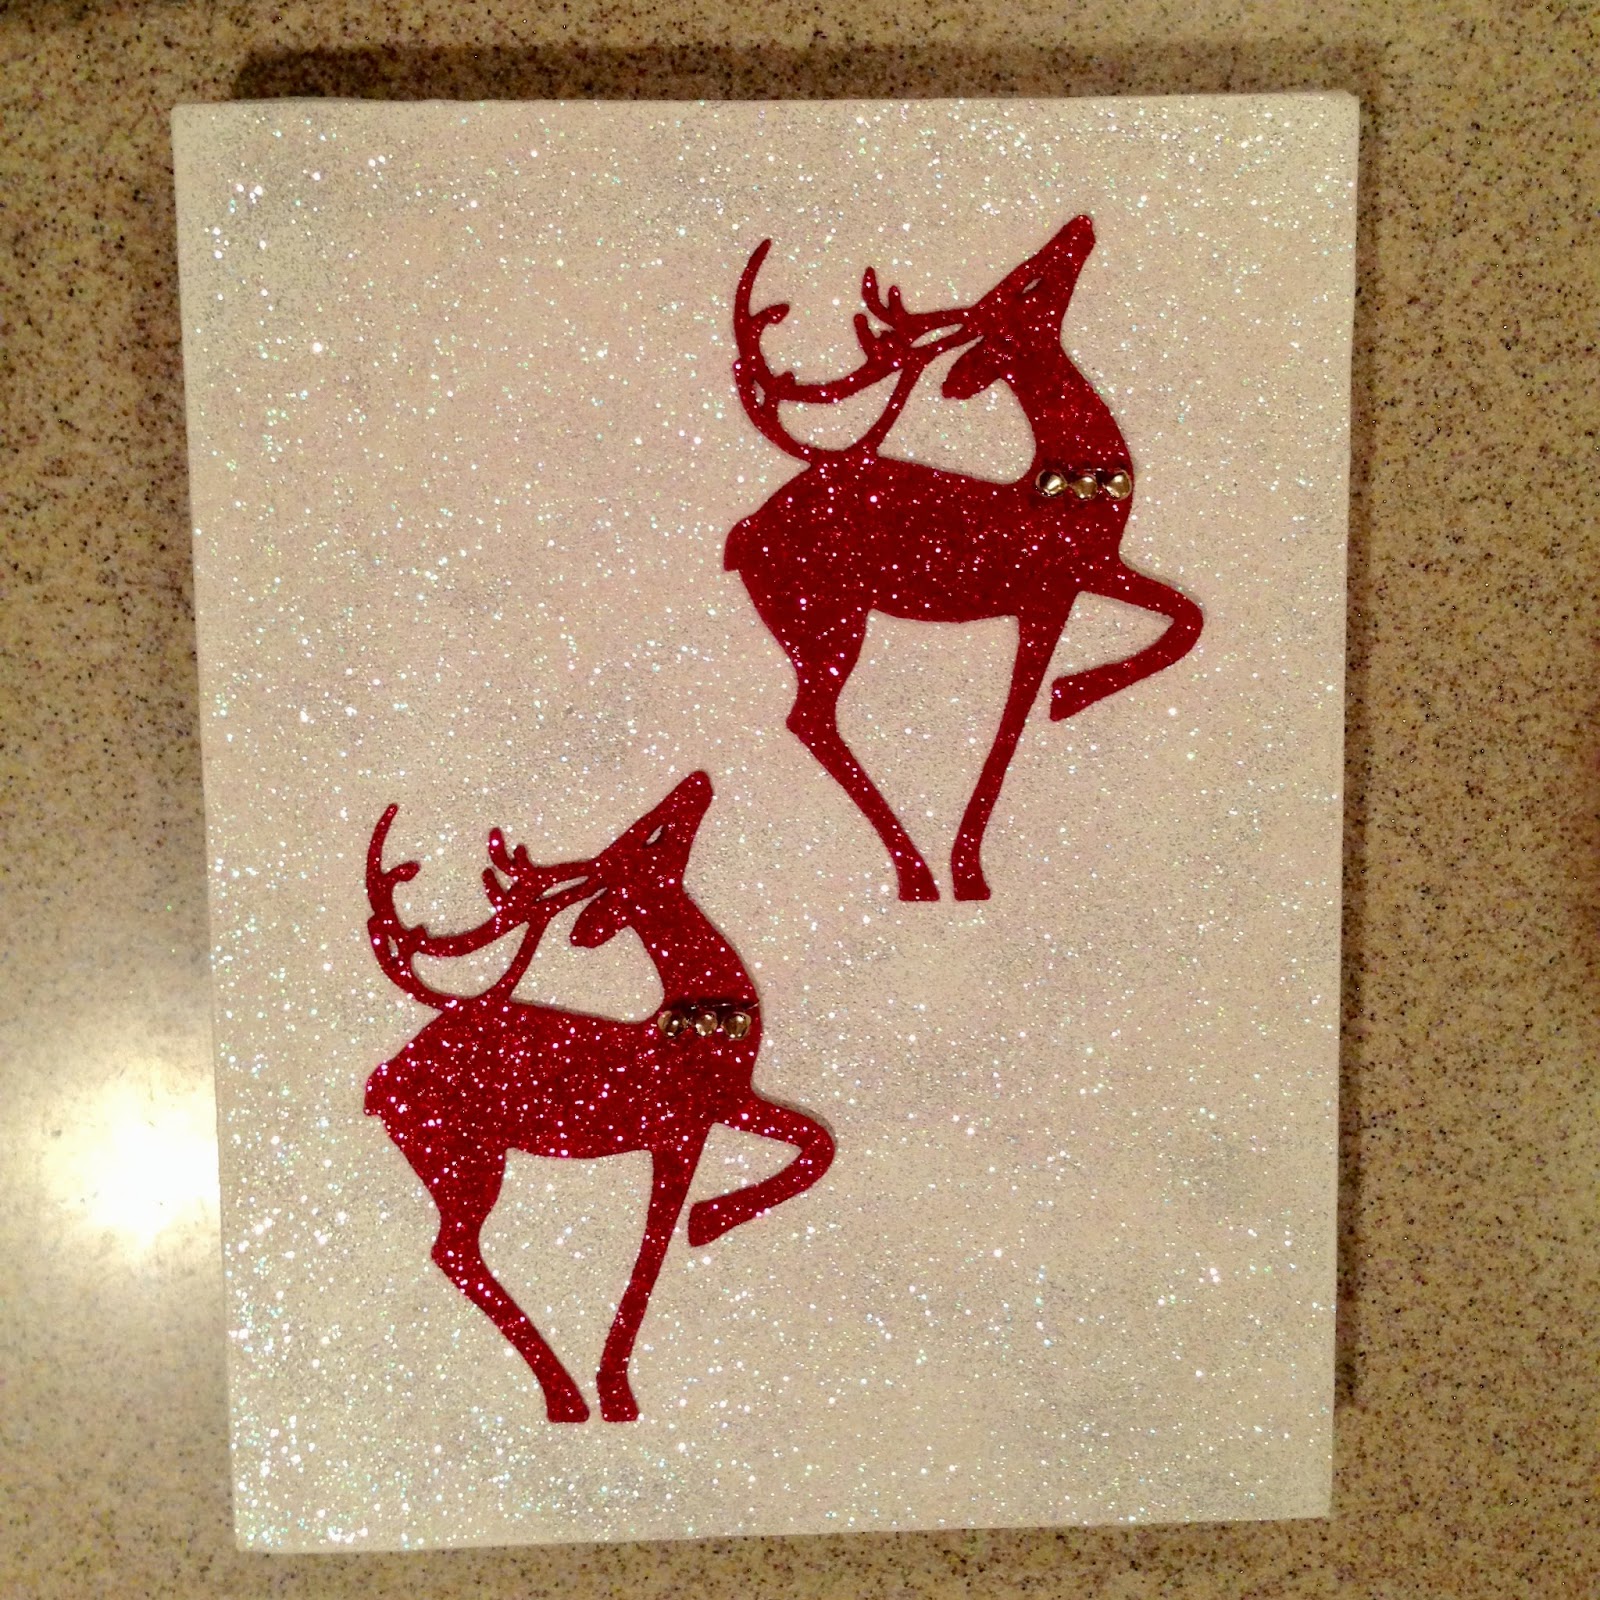
Ornament Christmas Art
I got these ornaments at the Dollar Tree. I got the glitter, Mod Podge and canvas at Michaels. It was a super easy craft to make.

What you need:
Glue gun
Canvas
Mod Podge in glossy
Sponge brush
Glitter
Flat ornaments from Dollar Tree

Spread a layer of glossy Mod Podge over the entire canvas. Then gently shake glitter over the entire surface. Let that dry. Place drops of hot glue in several spots on the ornaments and place it on your canvas. Gently hold it down for a minute to make sure it dries flat. Thats it!

What you need:
Glue gun
Canvas
Mod Podge in glossy
Sponge brush
Glitter
Flat ornaments from Dollar Tree
Spread a layer of glossy Mod Podge over the entire canvas. Then gently shake glitter over the entire surface. Let that dry. Place drops of hot glue in several spots on the ornaments and place it on your canvas. Gently hold it down for a minute to make sure it dries flat. Thats it!
Christmas Tree and Car Craft
I saw a decoration like this on a website but can't recall where I got the idea. It is a really easy craft to make. You can use any jar you like and you can even get a toy car at the Dollar Tree!


Then I take the car back out. I painted the stem of the tree brown. Then place a drop of hot glue on the top of the car where the tree will lay. I place the tree on the car and let the glue dry. After its dry I tied the thread around the tree and through the car windows. Next I placed drops of glue at the bottom of the inside of the jar where the wheels would sit and placed the car inside on top of the glue. Let that dry. Now sprinkle fake snow inside and you are all done!
You need:
a toy car
a small bottle brush tree
fake snow
a small thread or yarn
a jar
glue gun
marker
brown paint
First thing I did was place the toy car in the jar and mark where the wheels sit on the bottom of the jar so I will know where to place drops of hot glue.
Teddy Bear Honey Vanilla Challah Bread
I saw this recipe and instructions at Sweet Happy Life. This is my first time making a bread bear so he isn't perfect but I would call this success! She includes instructions for both braided challah and the teddy bear challah so make sure you scroll through the instructions till the end so you know you are looking at the right ones! I used chocolate chips instead of berries for the eyes and belly button.


Tuesday, September 23, 2014
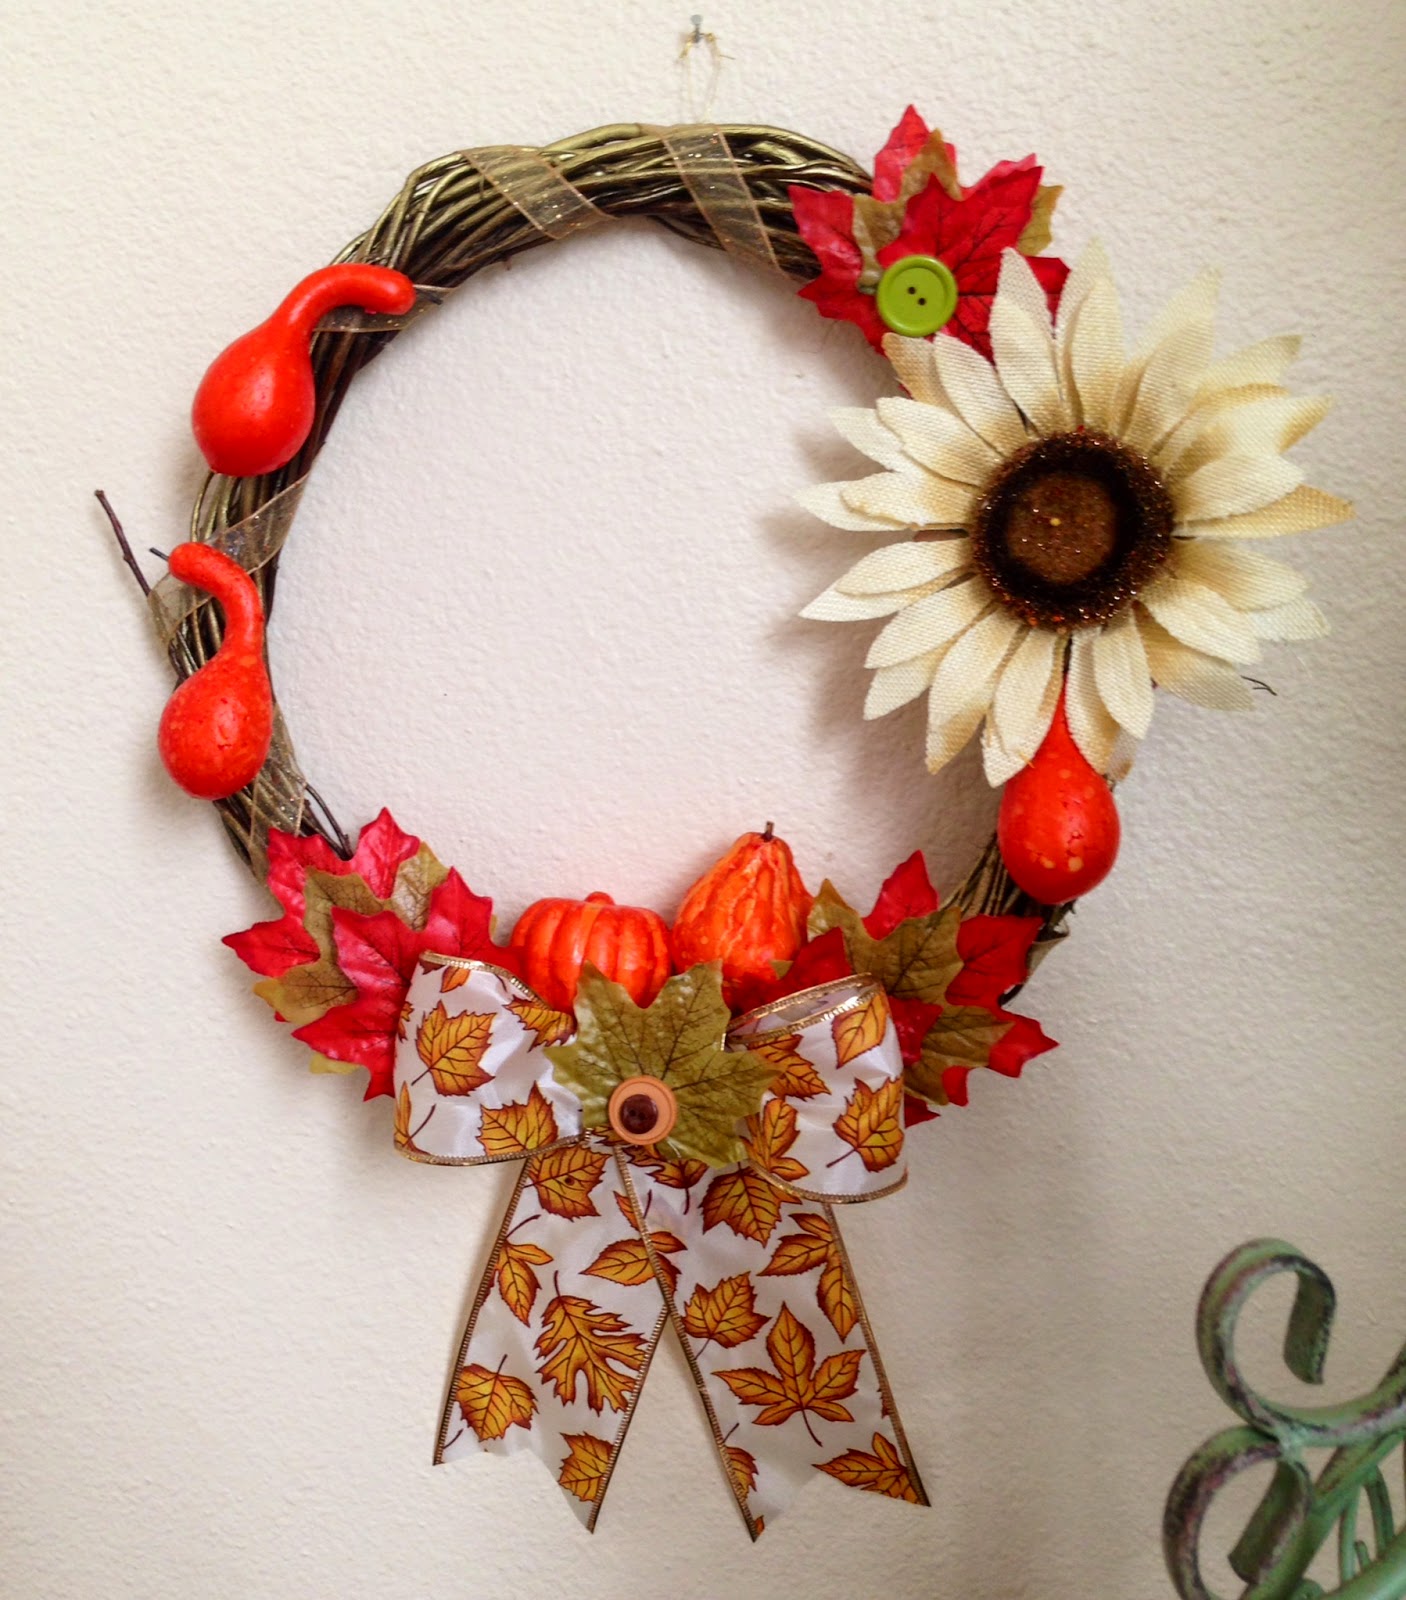
Autumn Wreath
Im not very experienced or great at making wreaths yet. But I like them for inside the home as well as the front door. I wanted a very inexpensive way to create one so I got all my materials from Dollar Tree. I know- based on my blog you would think I go there everyday! I almost do!
Cost: $5 (I already had the glue gun, spray paint, buttons and small sized ribbon)
You need:
Grape vine wreath
miniature pumpkins/squash
roll of fall season wire ribbon
fake loose leaves
clip on sunflower
buttons
any other ribbon you like
spray paint
glue gun
I lightly sprayed some gold paint on the wreath without totally covering it. I just wanted to add some pretty and warm sheen to the wood. It dried fast. Then I wrapped the entire thing with some thin sparkly gold ribbon. I attached it at the start and finish with a hot glue gun.
Next I glued the large bottom bow on. To make the bow I folded a foot long piece on both sides and glued the ends together in the center. Then I wrapped a small piece around the center and glued that to the back. Next I cut two medium sized pieces and attached them to the back to make the pieces that hang down. I know it would be great to have pictures of this but I made it so quickly I forgot to take any!
After the bow was made and glued to the wreath I experimented with placement of the leaves, buttons and the miniature pumpkins and squashes. I glued them on, once I was satisfied with the placement. I had to hold the pumpkins and squashes down for a minute while the hot glue dried so they wouldn't fall off.
After everything dried I clipped the sunflower on. It has an alligator clip on the back.
Thats it!
Fall/Halloween Decor

I start decorating for Halloween early every year. Its not even the 25th and Im all set up! I have been collecting decorations for a few years now. I have a pretty decent haul of things and most of it I got at Dollar Tree, thrift stores and Ross. Some of it I made. Most of it from Dollar Tree. I see no reason to spend a fortune on decor. I am going to share some images of what I have set up in my home and where I got it! The above door piece is from Ross.


I ordered this Tombstone Corners village from Dollar Tree here. It was only $10. The online set comes with 16 pieces (only one of those is a house.) For some reason it doesn't include the entire set so you can buy many more pieces (mostly houses and characters) from the actual store. The online set comes with a couple items you cannot get in-store though so it is worth ordering.
These two colored houses are not a part of that set. I got those at a thrift store for $2.


These above three images are all decor I got at Dollar Tree (I already had the bird cage.) The plastic window/door hangs are too large for any of my doors and so I hung them in front of our stairs instead. The lantern is small and comes with an LED light. The skeleton bends just enough to go inside my birdcage that hangs from the ceiling.


I got all of these light-up haunted houses at thrift stores over time. All for a few bucks. Same with the pumpkin tree.
And now finally my favorite- my fireplace hearth:

I got much of this at Ross- the pumpkins, the light strand, the haunted house, the crow and the stand-up metal cat. The other cats and the tree were from a friends garage sale. The hanging items, the small pumpkins, the snow globe, the head stone and the framed picture are all from Dollar Tree.
Im crazy about fall/winter decor so Im sure next year Im going to have even more to share!
Friday, September 12, 2014
Epsom Salt Luminaries
These are great for Christmas time or anytime. They look frosty and cast a soft glow.

Super easy to make too! Here is what I used:


First step- to color the Epsom Salt simply separate it into different bowls for your different colors. Then place one to two drops of food color in and mix it with a fork. After its all colored pour it onto a plate and gently shake it so that it evenly covers the plate.
Then I painted a thin layer of glossy Mod Podge onto some old candle jars I had cleaned out. I rolled them on the plate covered in a thick layer of the food dyed Epsom Salt (the crystal kind not the flake kind.) Let them dry for a day.
The next day I sprayed a layer of Satin clear coat over them to help hold the salt in place. Thats it!


Super easy to make too! Here is what I used:
Then I painted a thin layer of glossy Mod Podge onto some old candle jars I had cleaned out. I rolled them on the plate covered in a thick layer of the food dyed Epsom Salt (the crystal kind not the flake kind.) Let them dry for a day.
The next day I sprayed a layer of Satin clear coat over them to help hold the salt in place. Thats it!
Subscribe to:
Comments (Atom)